For many of us sending Admission Decision Letters is around the corner; it is one of my favorite parts of the year, candidate families become future families. It can also be stressful, you want everything to go off without a hitch while also making the process easy, memorable, and branded for your families.
In our post today we are going to be talking about a different way to get families into the Enrollment Portal. The standard Veracross way is through Decision Letter Templates, and while these are pretty, can include embedded videos, and work great, they can also slow families down with additional clicks. So what other options are there?
What I have recommended to schools and done at MKA is to send the Decision Letter through Composer, this works great because it goes straight to a parent's inbox and allows the parents to continue straight through to enrollment with one click.
So, how do we do this, what is the best way to send Decision Letters through Composer, great, well, glad you asked!
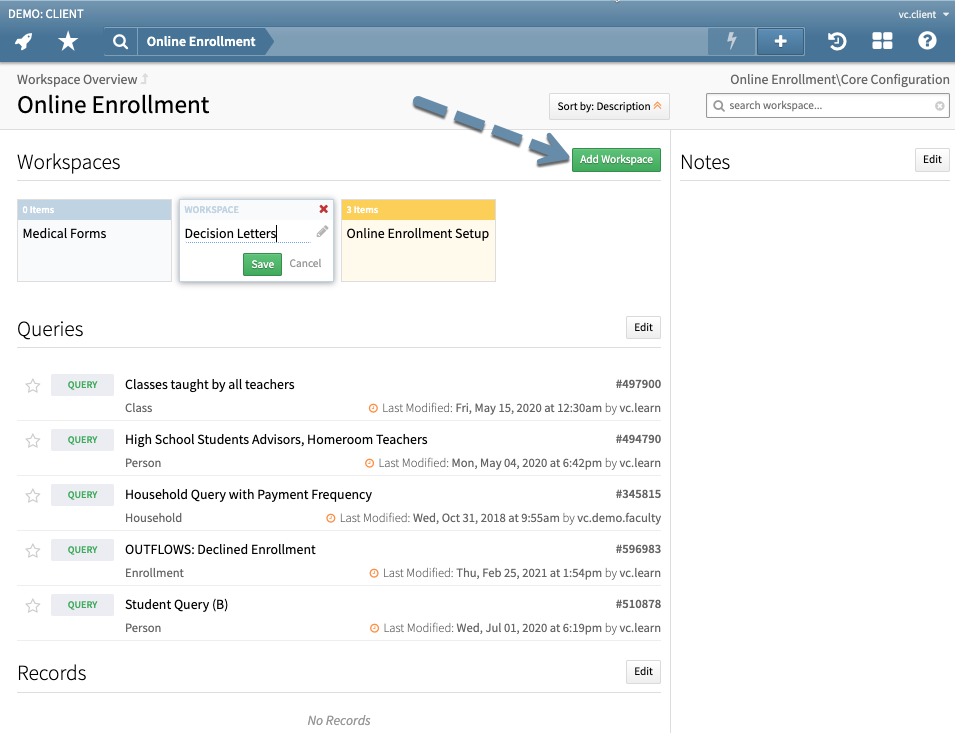
The first thing to do is set up a Sub Workspace for all of queries you are going to need (yes there is a good amount of set up work for the first year, but after that, very very easy).

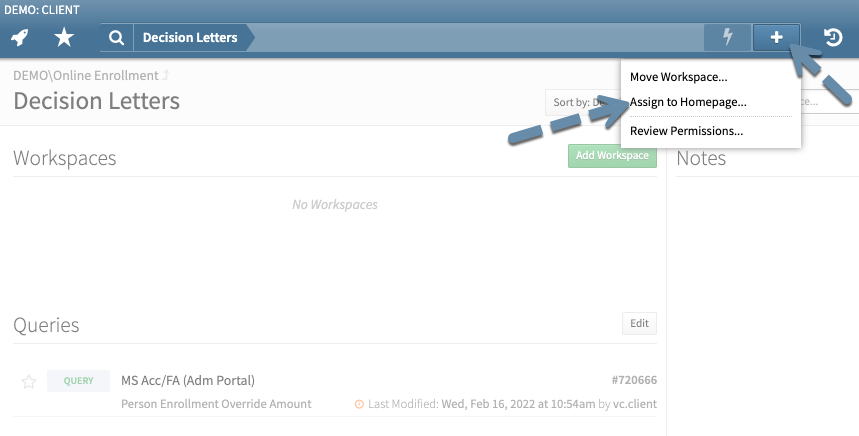
After the sub work space is set up I then Pin that somewhere on the Online Enrollment Homepage. This will give me a starting point to send my emails in the place where I do my other work for New Enrollment.

After the workspace has been set up, you can then begin saving your queries to the workspace. These queries should include every type of applicant who will receive a Decision Letter, think of the application decision (accepted, waitlisted, denied, etc.), the data you might want merged in the email (pronoun parts of speech, nick name, grade applying for), differences in school levels (do your different school levels want to say different things to their candidates), data sources (is there a different process if the applicant applied through EMA or other third party admission tools). Doing this you may end up with upwards of 15-20 different queries.
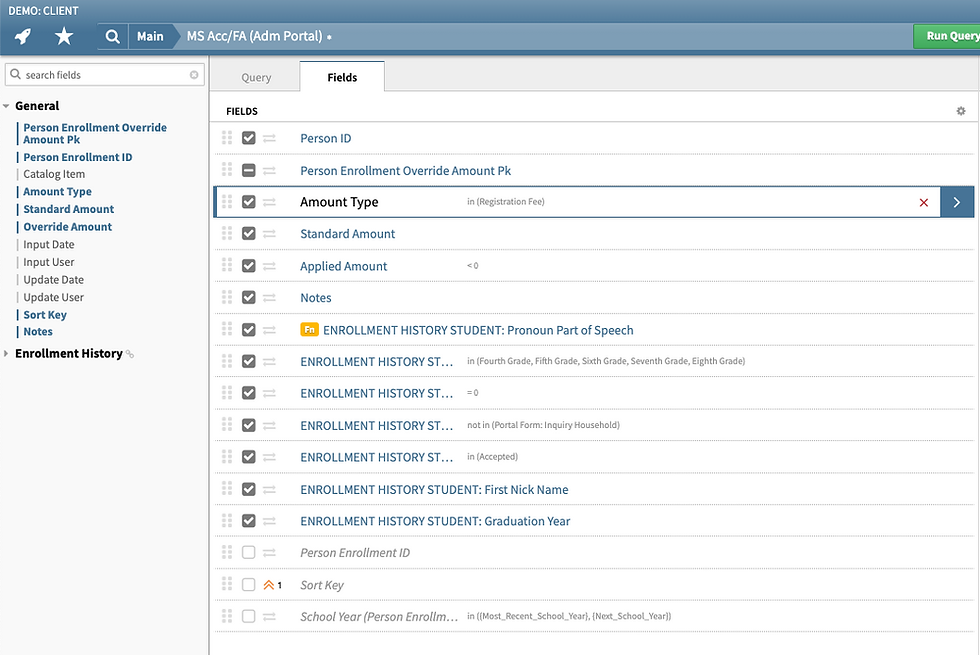
Here is a sample of a query:

This query includes the deposit amount, the grade(s) applying for, number of siblings, data source, and admission decision. These filters allow you to pull in exactly who should receive an email and allows you to merge in important data.
After the workspace and queries are set up, you can begin drafting your email in Composer. To do this, you should create a Channel to house your Decision Letter templates.

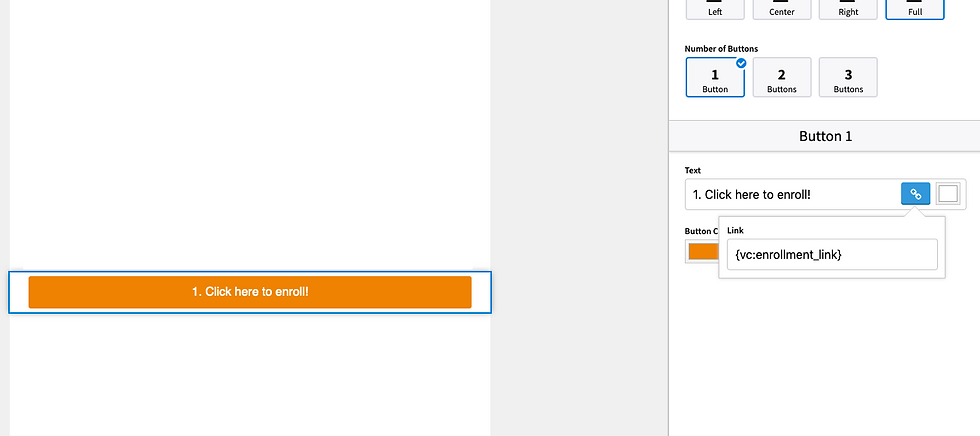
These Decision Letters should correspond 1:1 to your queries in your saved workspace and the actual templates should include any {data} merges that are available in your query. The most important merge being the the standard Veracross merge field '{vc:enrollment_link}'. This can be placed as a button or as a hyperlink:

After this, you are ready to test and send out your letters!
Now much of this may seem to reinvent the wheel, but there are a number of advantages
1) Complete control over the template
2) Fewer clicks for parents
3) Integrated Enrollment workflow
Please subscribe for more Veracross tips and tricks!
Comments